星期二, 9月 14, 2010

Installation of Lotus Notes R5 Guide (Lotus client 5.0.11)

Installation from CD-ROM is preferred and the following steps can be followed.
Wait for Auto Run of the Lotus installation program start.
On the screen “Please select from the following options”, choose “Install”.


On the screen, Click “Clients….”.


On the next screen, choose “Lotus Notes”.


Click “Standard install”.


Select “Next”.


Click “yes” to confirm.

Input the Name field and the company field.


Click “Next” to confirm install on default directory.


 Click “Next”.

Click “Finish” to complete.

The following steps can be followed to configure the Lotus Notes Client.
Running Lotus Notes is started by clicking “Start” -> “Program” -> “Lotus Applications” -> “Lotus Notes”.
On the screen “Setting up connections”, click “Next”.


Select “I want to connect to a Domino server.”.
 Choose “Set up a connection to a local area network (LAN)”.

Input the mail server name into Domino server name field. (for example: madh02n)


Click “Browse” button to select the user ID.


A message is prompted for copying the ID file to the data directory (default directory : c:\lotus\notes\data), click “Yes”.
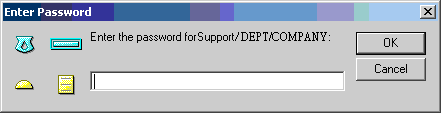
 Enter password for that user ID.


On the screen, Choose “I don’t want to create an Internet mail account.”
 On the screen, Choose “I don’t want to connect to a news server.”

On the screen, Choose “I don’t want to connect to another directory server.”
 On the screen, Select “I do not connect to the Internet through a proxy server.”

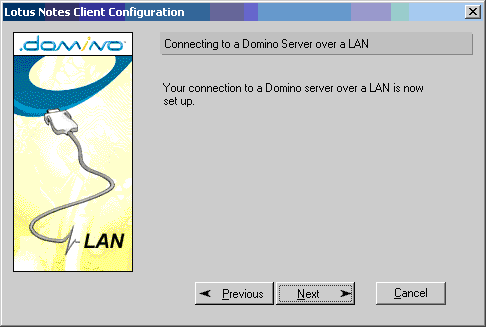
On the screen, Choose “Connect over local area network (or cable modem).”
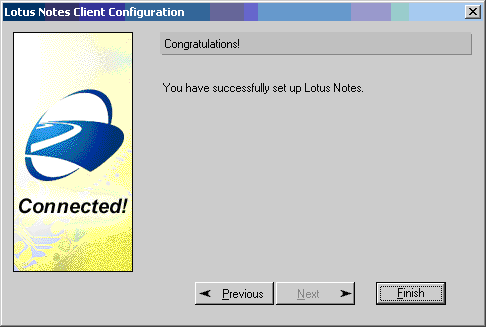
 Click “Finish”.

On the screen, Lotus Notes default use welcome page.

Click “database” icon on bookmark bar. Select “Workspace” and then right click mouse button should be show popup menu. Choice “Set bookmark as Home page.”

Click “Yes” to confirm, and then the installation should be finished.

星期一, 9月 13, 2010

使用 Lotus Notes 標記郵件為已讀取 / 未讀取 (read / unread) ?

在 inbox 中選擇該郵件之後,只需單按鍵盤上的「insert」鍵便可。同時該郵件的顏色亦會轉變。


紅色:未讀郵件
黑色:已讀郵件

星期日, 9月 12, 2010

Adobe flash player 安裝失敗

問:自從安裝 flash player 一次不成功後,便未曾成功安裝,同時不能移除舊有的 flash player,該如何做?


答:

1. 安裝 subinacl.msi
http://download.microsoft.com/download/1/7/d/17d82b72-bc6a-4dc8-bfaa-98b37b22b367/subinacl.msi
 

2.安裝 reset_minimal
http://www.adobe.com/support/flashplayer/ts/documents/fb1634cb/reset_minimal.zip

解壓縮後,將reset_minimal複製到 C:\Program Files\Windows Resource Kits\Tools\ 目錄下(即預設目錄)


3.下載 flash player 卸載器
http://download.macromedia.com/pub/flashplayer/current/uninstall_flash_player.exe


4. 重新安裝 flash player ,okay~

星期六, 9月 11, 2010

手機的上網數據流量

手機上網 MB 數流量產生原因
  1. 手機軟體自動更新
  2. 普通的上網
  3. 聊天
  4. 收發郵件
  5. 看視頻及電影

手機瀏覽網頁的MB數計法
  • 一般來說如果網頁没有自動 refresh 的功能,便只會在開啟該網頁時會產生流量。
  • 假若網頁有 3个 <img></img> 標籤,即使連接的是同一張圖片,實際上訪問這個頁面時該圖會被下載五次。

星期五, 9月 10, 2010

Q: 當使用 Office 來列印文件時,除了原先要列印的文件外, Office 會自動列印出一張文件資訊頁。為何會自動列印多了一頁?

例如:
===========================


檔名: xxxx.doc
目錄:C:\DOCUME~1\ADMINI~1\LOCALS~1\Temp\.....
範本:C:\Documents and Settings\Administrator\Application Data\Microsoft\Templates\Normal.dot
標題:XXX
主旨:
作者:wfh0804
關鍵字:hot news
註解:
建檔日期:d/m/yyyy h:mm
修訂版編號:1
前次更新日期:d/m/yyyy h:mm
前次存檔人員:wfh0804
編修總時間:15分鐘
最後列印在:d/m/yyyy h:mm
最後列印的字數
  頁數:x
  字數:x(約)
  字元數:x(約)

===========================


A: 這是因為閣下在 Ms Office 設定了「附帶印出摘要資訊」。

步驟一: 在任何應用軟體中(如 Microsoft Word) 按下「列印」=> 「選項」


步驟二 : 取消選擇「摘要資訊」即可


p.s. 如果打印文件時未能正常顯示頁碼,只能打印 {PAGE},可嘗試剔除「功能變數代碼」。

星期三, 9月 08, 2010

Lotus Notes 的 Home Page 不是 Workspace 板面

新安裝 Lotus Notes 時,預設開啟時不是 Workspace 頁面的。
如果希望下次 execute LN 時 default 跳至 Workspace,設定如下:

     鼠標移到 Databases -> 單擊左鍵
-> 鼠標移到 Workspace -> 單擊右鍵
-> 鼠標移到 Set Bookamrk as Home Page -> 單擊左鍵


星期二, 9月 07, 2010

Access Point of HKIT CSW Campus

香港科技專上書院九龍校舍無線接入點
WIFI information of HONG KONG INSTITUTE OF TECHNOLOGY


地點: 九龍長沙灣長沙灣道638號


SSID: HKIT-CSW
KEY: wireless4hkit


Country: HONG KONG
Region: HONG KONG (SAR)
City: HONG KONG
Latitude: 22.24786
Longitude: 114.203384
Time Zone: +08:00
Net Speed: DSL
ISP: PACNET
Domain: CITA.COM.HK
IDD Code: 852


無線區域網路介面卡 Wireless:

連線特定 DNS 尾碼 . . . . . . . . : hkit.edu.hk
DHCP 已啟用 . . . . . . . . . . . : 是
自動設定啟用 . . . . . . . . . . .: 是
子網路遮罩 . . . . . . . . . . . .: 255.255.255.0
預設閘道 . . . . . . . . . . . . .: 192.168.2.5
DHCP 伺服器 . . . . . . . . . . . : 192.168.2.5
DNS 伺服器 . . . . . . . . . . . .: 192.168.2.5
NetBIOS over Tcpip . . . . . . . .: 啟用


IPcop 1.4.21
Configuration page:
http://cswgateway.hkit.edu.hk:81/
https://192.168.2.5:445/cgi-bin/index.cgi

推薦此文